Hear Ye!

Welcome New Sisters! (click for current roster)

Merit Badge Awardees (click for latest awards)

My featured Merit Badge Awardee of the Week is … Shannon Hudson!!!

Shannon Hudson (hudsonsinaf, #5349) has received a certificate of achievement in Garden Gate for earning a Beginner, Intermediate & Expert Level Putting Away for Winter Merit Badge!

““For the Beginner badge, my oldest daughter and I froze strawberries, tomatoes, and most recently, blueberries. The strawberries and blueberries we freeze on trays individually first, and then place in freezer bags. The tomatoes we wash off, and then just put them in the freezer in a container. I also shared this information on my Henhouse.

We enjoy frozen produce, especially fruit. With the summers being so excruciatingly hot, pulling frozen fruit out to eat, or for smoothies, is extremely refreshing.

For my Intermediate badge, I dehydrated tomatoes, peppers (both sweet and hot) and multiple types of herbs. I also investigated different methods for drying produce. We generally use a dehydrator, though some of my herbs, I air dried. You can also sun dry, oven dry, or microwave dry. For my family, I made spaghetti, using frozen tomatoes, with dehydrated peppers and herbs.

Making spaghetti sauce is one of our favorite ways of using frozen tomatoes. When I pull them out of the freezer, I place them in a colander. As they thaw, a lot of the excess fluid drains out, this reduces the cooking time for the sauce.

For the Expert badge, I investigated the different methods for canning food – there is oven canning (I haven’t tried this one yet!), water bath canning, and pressure canning. We have canned tomatoes, fruit products (sauces, preserves, jams, syrups, pie filling, and just sliced fruits), dried beans, green beans, and broths. I also made some beef jerky in my dehydrator using grass fed brisket, as well as sharing about canning with the Henhouse.

For the dish using foods I had preserved, we made chili. I used both frozen and canned tomatoes, canned kidney beans, dehydrated peppers, and dehydrated herbs. It turned out scrumptious. I really want to try my hand at oven canning… I would like to learn to make gluten free pasta, that I dehydrate, and then oven can. Still working on this one though.”

  1. Winnie Nielsen says:

    Congratulations Shannon for achieving all three levels of Putting Away for Winter badge! With your large family, I know this must be a huge money and time saver for getting delicious meals on the table every day.

    Once I used the oven canning method to make mini pumpkin bread servings in jelly size jars. They turned out delicious and I used them one Fall as gifts for family with decorated lids and a fork attached to the top with a ribbon. Not sure if regular foods are more complicated to use the oven method. Let us know what you discover when you get a chance to try it out.

Leave a Comment

Your email address will not be published. Required fields are marked *

photo-of-the-day

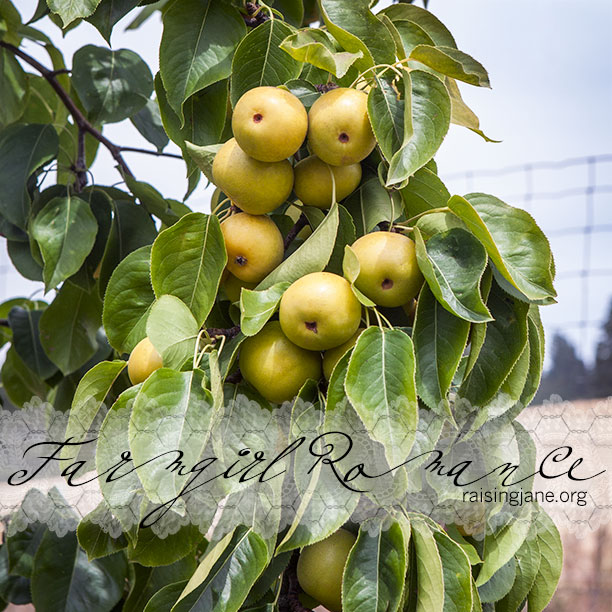
farm-romance_5767

  1. Winnie Nielsen says:

    Apple and Brie sandwiches for lunch, apples for a mid afternoon snack, and Apple Pie for dinner (with sharp cheddar cheese) please!!

Leave a Comment

Your email address will not be published. Required fields are marked *

photo-of-the-day

farm-romance_5698

  1. Winnie Nielsen says:

    This looks like either the bird is molting or it is a young one still getting it’s new feathers. #summermakeover, #allglammedup

Leave a Comment

Your email address will not be published. Required fields are marked *

Get It Together Merit Badge, Expert Level

The adorable, always humorous MBA Jane is my way of honoring our Sisterhood Merit Badge program, now with 6,571 dues-paying members who have earned an amazing number of merit badges so far—9,327 total! Take it away, MBA Jane!!! MJ 

Wondering who I am? I’m Merit Badge Awardee Jane (MBA Jane for short). In my former life   

For this week’s Farm Kitchen/Get it Together Expert Level Merit Badge, I was a little wary. A little concerned. Perturbed, if you will.

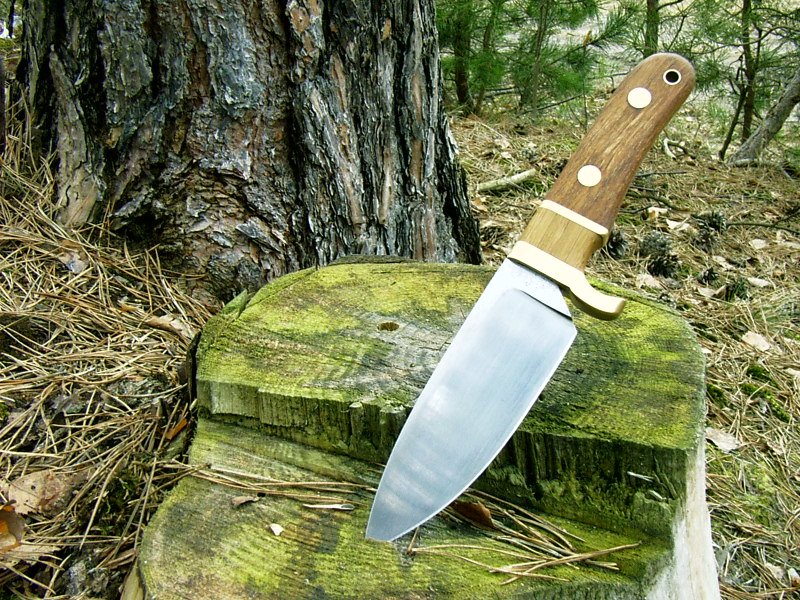
Sharpen all my kitchen knives, and keep them razor sharp at all times?

Sounds terrifying.

Photo by Nóż użytkowo via Wikimedia Commons

I mean, wasn’t I the epitome of safety, the guru of precaution, the wizard of cautiousness, by keeping my knives at the blunt end of the spectrum?

Turns out … not so much.

Actually, a little note from me to you, chickadees, a sharp knife is much less dangerous than a dull one.

Guess I wasn’t the sharpest tool in the shed.

Haha!

When I first discovered that little fact (the one about the knife, not the one about what’s between my ears), I was startled. It just didn’t make sense. But here’s the deal, peeps:

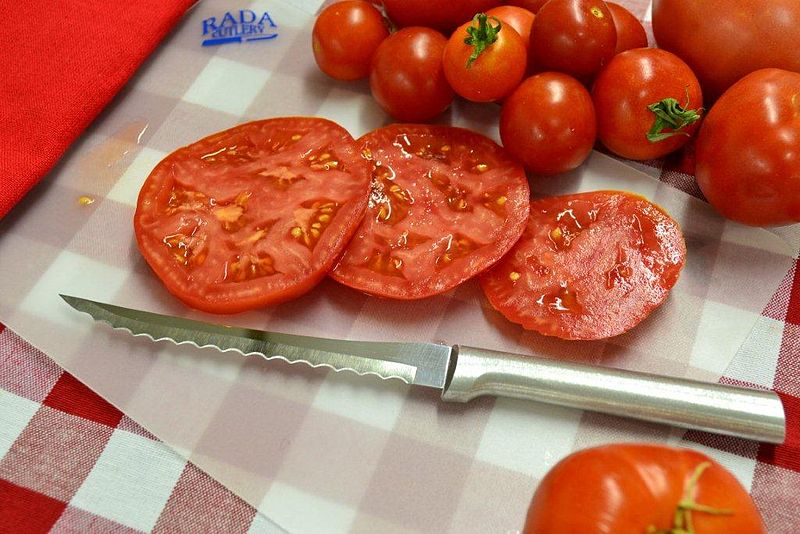
If your knife is so blunt and dull that it can’t even slice a tomato without making Grammy’s famous marinara sauce, then you’re probably going to use a lot of excess force. And excess force, however good for your forearms and biceps, is not so peachy keen when you’re chopping and dicing and slicing and peeling and julienning and etc, etc.

Photo by Knightia13 via Wikimedia Commons

Also, dull knives slip around quite a bit more (probably because they’re gleefully somersaulting away in their fiendish attempts to never mince the garlic) and that’s never a good thing either.

So, color me late to the party, but I’m here now. And guess what I brought? To our imaginary party, I mean?

Sharp knives.

I feel like a ninja.

Photo by Stéphane Gallay via Wikimedia Commons

My tomatoes are sliced to a paper-thin degree, my garlic is finely minced, my apples are quartered and peeled and diced (did somebody say pie?), my bread hasn’t been hacked to death, my roast chicken looks like it was butchered by Julia Child herself, and I am one happy camper.

I’ll never go back to those dull-as-dishwater knives again. I’m a changed woman!

If you’re interested in sharpening up your cutlery, here are a few ideas and methods to get you started on your way to culinary delight:

  • A whetstone
  • A knife steel (sometimes called a honing steel)
  • A high-quality knife sharpener

And hey, don’t be slow in deciding …

Chop, chop!

  1. Winnie Nielsen says:

    My mom always keep her knives sharp and I learned from her how to do it. When she moved into the assisted living facility, I got her small hand held knife sharpener and it continues to keep my knives sharp. There is nothing more annoying or dangerous than a dull knife because it makes you use it improperly and that increases the possibility that you will injure yourself. Lessons learned from my own mistakes!

  2. Cindi says:

    Think it’s time for a bit of knife tune-up here in this household ~ sharpen first, no worries later.

Leave a Comment

Your email address will not be published. Required fields are marked *

Hear Ye!

Welcome New Sisters! (click for current roster)

Merit Badge Awardees (click for latest awards)

My featured Merit Badge Awardee of the Week is … Judith Lickteig!!!

Judith Lickteig (#3926) has received a certificate of achievement in Garden Gate for earning an Expert Level Herbs Merit Badge!

“This year, I am growing all my herbs in pots, which I hope to move to raised beds next year. Three new herbs I am growing are borage, catnip, and peppermint.

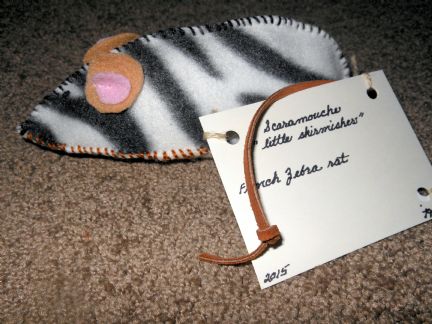
The borage flowers are beautiful! I’ve used the fresh flowers and new leaves in salads. Also, the flowers are a pretty blue and star-shaped. I like to freeze the flowers in ice cubes and add the cubes to lemonade or ice water. I’ve harvested some of the catmint for tea and for adding to cat toys. I’ll try to add a picture of one I made. I plan to send a photo of a cat toy and the pattern to the Wildflower Henhouse sisters. I have also included teabags of dried catmint for use as tea or to put in the toys. My son’s family uses a supply of catmint regularly as a digestive and a calming mint tea. I laughed when he told me that once, he drank so much of it that his nose became numb. Ha! I will also send the Wildflowers teabags of my dried peppermint. This is really a great tea for calming stress and insomnia. My entire family drinks it for colds or just calming.”

DSCN0548

  1. Winnie Nielsen says:

    What a successful herb crop you have going this year. Love your darling catnip mouse too. My kitty would go nuts over it, I am sure! Congratulations on getting your Expert Level badge with your project!!

  2. Love that little mousie ! I make them as Xmas gifts and I use the polar fleece which is well nigh indestructible- you know ,red ears and tail and green body or visa versa. Sounds like you have the herb thing well sewn up .

Leave a Comment

Your email address will not be published. Required fields are marked *

photo-of-the-day

farm-romance_5364

  1. Winnie Nielsen says:

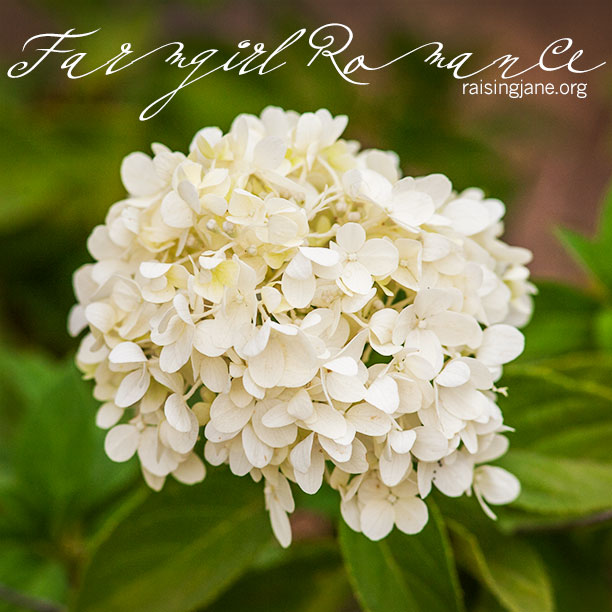
    August means flowers galore!

Leave a Comment

Your email address will not be published. Required fields are marked *

Young Cultivators Merit Badge: Get Buggy, Beginner Level

The adorable, always humorous MBA Jane is my way of honoring our Sisterhood Merit Badge program, now with 6,571 dues-paying members who have earned an amazing number of merit badges so far—9,327 total! Take it away, MBA Jane!!! MJ 

Wondering who I am? I’m Merit Badge Awardee Jane (MBA Jane for short). In my former life   

To help my sweetie-pie neighbor, Piper, earn her Beginner Level Garden Gate/Get Buggy Merit Badge, I devised a sneaky plan.

Well, maybe it wasn’t sneaky, but it sure was clever (if I do say so myself … and I do).

You see, like a lot of little ones—especially the female ones—Piper wasn’t overly fond of insects. Maybe it was their spindly little legs; maybe it was their ability to appear when they’re least wanted; maybe it’s because her brother, Joey, likes to toss them on her head … well, whatever the reason, I was bound and determined to change Piper’s outlook on all things buggy.

photo by Dominik Stodulski via Wikimedia Commons

We started with a scavenger hunt (the ones we can’t find in our area, we simply looked up online). That’s right, a scavenger hunt of the bug variety! No little kiddo can resist a scavenger hunt. Golly, I can’t resist one either, actually … which explains why I was up in an oak tree chasing a fuzzy caterpillar earlier this afternoon.

MBA Jane’s Buggy Hunt

A. Ladybug

B. Bumblebee

C. Dung beetle

D. Silkworm

E. Cochineal

F. Blowflies

G. Honeybee

H. Fruit flies

Next, we matched the bugs to their helpful qualities:

1. Let’s hear it for pollinators!

2. Eats … um, poop. Well, somebody’s gotta do it, right?!

3. This guy helps scientists in the laboratory with genetics and biology, though they don’t make white lab coats small enough for him.

4. Can you say ‘honey,’ and ‘beeswax?’

5. We appreciate these bugaboos for producing red dye for clothing, lipstick, and food. Although we really only appreciate the cloth part … ugh for the other two!

6. Eats aphids. Better them than us!

7. Makes silk for cloth. Gotta love a set of decadent silk pillowcases on a hot summer’s night. Thanks, buggies.

8. Doctors use these handy bugs—that are members of the maggot family—to help stop infections. Wow!

At the end of our little hunt and educational bonding time, Piper and I felt like real entomologists. We had a brand-new love and gratitude for the tiniest members of the animal kingdom (although we couldn’t find a good reason for the existence of cockroaches or mosquitoes, no matter how hard we tried).

And we barely jumped at all when Joey flicked a few Daddy Long Legs at us.

photo by James Petts via Wikimedia Commons


*Answers to Jane and Piper’s Entomology Hunt

A/6

B/1

C/2

D/7

E/5

F/8

G/4

H/3

  1. Winnie Nielsen says:

    I got 5 correct, which is better than I thought it would be. Looks like I need to spend more time learning about these everyday insects!

  2. Karlyne says:

    Blowflies are used by doctors to stop infection? Now that’s something I had no idea of!

  3. feeling buggy, got em all right-yayay-used to have a gorgeous antique woven coverlet that was cochineal dyed- wonderful magenta kind of color

  4. Pingback: University of Calabar Educational Consultancy Programmes Admission 2015/2016 Academic Session | Fresh Career Jobs

Leave a Comment

Your email address will not be published. Required fields are marked *

Hear Ye!

Welcome New Sisters! (click for current roster)

Merit Badge Awardees (click for latest awards)

My featured Merit Badge Awardee of the Week is … Marcia Neigebauer!!!

Marcia Neigebauer (marcian12, #5947) has received a certificate of achievement in Each Other for earning a Beginner, Intermediate & Expert Level Entrepreneurial Spirit Merit Badge!

“I dreamed of owning a Bed and Breakfast. My dream came to being in 2013. I worked on marketing the Inn and have so many guests looking for rooms, that I than dreamed of buying the house next door to add rooms. I have found some financing in place for the short term. I am working on my expenses and marketing our Inn.

DSCN8038

On Tuesday, July 14, we will be able to purchase the home next door and will need to work very fast to have rooms ready at the end of the month. I am very excited about the rooms we are already booking into the new addition. Our website is DelanoInn.com. We are also adding an apartment over the garage on the property next door.”

  1. Winnie Nielsen says:

    Marica, your B&B is fabulous!! Wow, what a beautiful and historic place you have pulled together. Congratulations on getting your dream to become a successful reality too! I am sure it has been a lot of hard work coordinating all the aspects of running a business. I am delighted that you have bookings coming in and I wish you all the best with adding the home next door to the mix. If I ever get up to your area, I will be sure to book a room and visit. It all looks so cozy and welcoming!

Leave a Comment

Your email address will not be published. Required fields are marked *

Rootin’ Tootin’ Merit Badge, Intermediate Level

The adorable, always humorous MBA Jane is my way of honoring our Sisterhood Merit Badge program, now with 6,487 dues-paying members who have earned an amazing number of merit badges so far—9,234 total! Take it away, MBA Jane!!! MJ 

Wondering who I am? I’m Merit Badge Awardee Jane (MBA Jane for short). In my former life   

For this week’s Garden Gate/Rootin’ Tootin’ Intermediate Level Merit Badge, I was excited to learn more about new my newfound buddies, the unassuming and oh-so-humble root vegetable. Not just learn more, but eat more, too (sorry, friends).

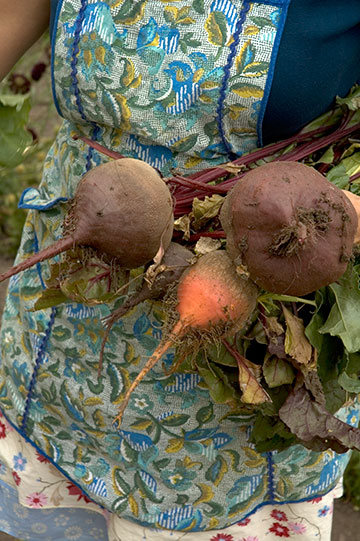
First of all, I planted my own: one super-neato thing about growing your own is how easy it is. Sign me up for that, since my green thumb tends to be more on the dingy grey side (but I’m learning). I decided to try beets and radishes because they don’t mind cold temperatures and they grow super-fast. I’m all about instant gratification, okay? Don’t judge.

Radish

Both are perfectly content to grow in my area and environment, so make sure you know what’s happy and native to your area before you pick your own. It’s never the most fabulous idea to force and transplant something that doesn’t belong, right? But don’t let those parameters stop you or give you pause; after all, even if carrots seem to be your best bet, did you know there are purple and yellow and even black varieties? Gorgeous and munch worthy, to say the least.

My radishes were ready—seed to picking—in as little as 20 days. I told you I was all about the instant gratification, didn’t I?

Here’s what I did with my radishes and beets:

Roasted Radish “Chips”
Thinly slice radishes and toss with olive oil. Spread on a baking sheet lined with parchment paper. Sprinkle with garlic salt. Roast at 375°F for about 20 minutes (time will vary, based on how thin the slices are and how your oven cooks), flipping once or twice. Five minutes before finished, toss with Parmesan cheese and bake until golden.

Flavor variations: use pink Himalayan salt and fresh dill instead of garlic salt and Parm. Or try a sweet and savory combo, like tossing with honey and cinnamon!

Radish Pickle Salad (Cuz everything is better in pickle form, am I right?)
Arrange thinly sliced radishes in your prettiest bowl. Toss with apple cider vinegar (any vinegar will work, but balsamic might turn your red and white radishes an odd shade of brown), a swirl of olive oil, 1-2 t salt (depending on your taste), one fresh garlic clove, finely chopped, and either a swirl of honey or a sprinkle of sugar. Add fresh herbs if you have them. Allow to marinate in the fridge for an hour or so to really develop the yummy flavors.

Sautéed Beets
Wash and peel beets with a vegetable peeler (bonus: it’s not just for carrots anymore). Sauté over medium heat in equal amounts of olive oil and butter until softened. Toss with salt and pepper. You can also add in the chopped tops—the greens—and splash a bit of apple cider vinegar in at the end. Delish!

Roasted Beets
Wash and peel beets. Either slice or dice, depending which shape floats your beet boat. Spread on a well-greased cookie sheet and toss with salt and pepper, lemon zest, and olive oil. Roast at 400°F until crispy around the edges and soft in the middle.  About five minutes before finishing the baking process, remove from oven and add in a grated hard cheese, like Parmesan or aged Gouda. Toss, and finish roasting.

Another idea for your root vegetables if your taste buds are skeptical: add them in wherever you use potatoes. Try it next time you’re making mashed potatoes: skip half the taters and add in parsnips or beets or celery root instead. See what your mouth thinks then. Me thinks it will be happy indeed.

  1. Winnie Nielsen says:

    I am all about beets anyway (except pickled ’cause this Farmgirl is not a vinegar fan) you make them. We also have a radish down here that is about the size of a beet but is beautifully ringed inside. Do you have them out West? They are so sweet and crunchy in salads and just beautiful with their reddish rings against the greens of a salad.

    Roasted root vegetables are one of our favorites anytime of year. I love to mix them all up for color too. Easy peasy, as MBA would say, and always relish!~!

  2. Karlyne says:

    Oh, dear. This brought back such memories of my mother. She would put turnips in the stew and I would think they were taters and… Well, she would’ve smacked me for throwing up at the table, but I came close a time or two. Raw? Yes. Cooked? No, no, no, a thousand times NO!

Leave a Comment

Your email address will not be published. Required fields are marked *

Hear Ye!

Welcome New Sisters! (click for current roster)

Merit Badge Awardees (click for latest awards)

My featured Merit Badge Awardee of the Week is … Miranda Strickland!!!

Miranda Strickland (#3535) has received a certificate of achievement in Make it Easy for earning a Beginner, Intermediate, and Expert Level Grease Chicks Merit Badge!

“Well, I am actually applying for all three levels at once. It started with me doing a tuneup with my husband and my mentor on my OLD truck (’04 Trailblazer) as well as the oil change.

But, Memorial Day was a bad day for folks in my area. Several people lost their homes or businesses, or had damage. Others of us lost our vehicles. I was blessed, however, and a family friend traded me my Trailblazer (severe water damage and all) for a 1974 Chevy C10 pickup. Now, most would not call it a fair trade, but it really was. The truck is awesome!

I have been keeping an eye on fluid levels and gas mileage (which is how we figured out the carburetor needed a rebuild) and changed out a headlight, tail light lens, assisted in pulling spark plugs and, as I have an oil leak at the moment, I have been keeping an eye on my oil levels and refilling as needed. (New gaskets will be another project.)

Once I got it, we discovered I had a few more problems than originally anticipated. This included the Master Cylinder (which had been replaced less than a month prior to my taking the truck) blowing out. We pulled the cap off and found the front chamber empty. We pulled the back wheels off to check the brakes, but they were clean. My husband had me put the wheels back on (I’d never used an impact driver before … it was fun!) and my mentor (the shop foreman at the shop where we got the truck) inspected the front brakes and all the connections. We determined that the system likely had not been bled properly before, and so the master cylinder blew, which meant getting a new one installed. I did not get to assist in that, but they walked me through the steps and even let me fill the old master cylinder with fluid to see if it was leaking. It wasn’t after that, but it also wasn’t working. I also sat in as they installed the new Morosa valve covers and the gasket material.

My third “expert” level project (plugs, brakes/wheels) was last Sunday at the shop, assisting my mentor with rebuilding the Quadrajet carburetor. I did the cleaning, part of tearing it down, part of reinstalling and listening/watching carefully as he explained everything that was wrong with it. He seemed very impressed with how much I understood!

The truck still needs a lot of work. New gaskets, all new wiring, new battery cables, new hood, new mirrors, etc. It’s not truly finished, but these old vehicles are not cake walks.

I learned with my previous vehicle, however, that NO vehicle is a cake walk. Let me tell you, being 5’4″ and trying to pull plugs from an Inline 6 is NOT an easy task.

I have discovered that I am actually pretty good at mechanic work and have been in school to be a motorcycle tech for a little over a year. With the experience I have gained over the past month and a half, I have decided to start looking for a job in the field!”

TheStoryOfChadd

  1. Winnie Nielsen says:

    Wow, Miranda, what a great learning quest you have been on! It is fantastic that it has lead you to more schooling and now the possibilities of employment too. Congratulations on all of your hard work and I hope you are able to find work in your new field of expertise. I just have one question? Will you be the only tech all aproned up MaryJanesFarm style?

Leave a Comment

Your email address will not be published. Required fields are marked *